

It's been such a long time since I've written in this blog. So long in fact that I don't even know how to start or where to begin in this blog post.
Let me first start off by saying that I feel very blessed and humbled to be present enough to write to you. To say that a lot has happened over this past year would be a gigantic understatement for sure. For starters we welcomed our 6th bundle of love; a baby girl that we all love to the moon and beyond. I started working part time for an app that I whole completely believe in, I'd be been watching all of my babies grow and thrive and I started on my second set of locs. It's been a pretty busy year.
Due to our household being that much bigger and my responsibilities around here being that much more demanding I can't write that long, but I make it a mission of mine to get back to writing and back to sharing a little piece of my life with you.
What's to come with this blog in the upcoming future? I'll continue to share my loc journey, I'll get back to trying out different recipes that I find entertaining and will share my experience and outcome with you, I'll get back to finishing up a Deadpool blanket that I STILL haven't completed yet; yup it still isn't completed, and I plan on doing my best to get back to writing crochet patterns. There's a lot more to come to this blog as well but I'm just going to share the main points that I can think of at this moment since the beautiful noises of my children are taking over of what used to be my quiet little space. They're noisy little brats but they're my brats and I love them.
With that said I must sign off here but until next time be blessed and I hope to be back here to catch up with you soon!
CJ
Friday, August 9, 2019

Wednesday, January 17, 2018
Baby Love's Christmas Gift Is Complete!! | Another Knitted Sampler!

Happy New Year to whomever is reading this entry! I wanted to write this very quickly to let you know that I finally finished my daughter's Christmas gift and I was able to do so right on time! It took me close to eight months to complete this but please know that it was all worth it in the end.

All of the patterns that I used were from 99 Knit Stitches and 60 Easy To Knit by Leisure Arts, the yarns I used are both Red Heart Super Saver Solids, and the size knitting needle that I used is a size 10mm 6.0.
I'm not quite sure what I'll be knitting next but I think I'm leaning towards knitting up a quick pair of booties for my baby girl. The pattern that I will most likely use is a pattern that I've used off and on for a few years now due to how easy and quick the project is.
Blessings!
I'm not quite sure what I'll be knitting next but I think I'm leaning towards knitting up a quick pair of booties for my baby girl. The pattern that I will most likely use is a pattern that I've used off and on for a few years now due to how easy and quick the project is.
Blessings!
Tuesday, August 29, 2017
Crochet Flower Bookmark Pattern!!

What you will need :
-1 skein of Red Heart Super Saver yarn. The color(s) can be up to you.
- Size F crochet hook
- Scissors
Let's get started!!
Start off my making a slip knot and placing your crochet hook in the middle of your slip knot. Now you're ready to crochet!!
Round 1) Ch4, sl st in beginning ch to make a small ring, ch3, 13dc in the center of small ring, sl st in beginning ch.
Round 2) Ch 3, dc same st, 2dc in every stitch all the way around, sl st in beginning ch.
Round 3) Ch 5, dc in the same st, *ch1, sk one st, dc in next st, ch 2, dc in the same st to create a v-stitch. Repeat from * all the way around until you get to the last 3 stitches, ch 1 sk one st, dc in next st, ch 2, dc in same st, ch 1 and sl st in beginning ch.
Round 4) Ch 3, sl in first ch 2 space (first v stitch from previous round), ch 3,sl st in same ch2 space, *sl st in ch1 space, sl st in next ch 2 space, ch 3, sl st in same ch 2 space, repeat from * to last ch1 space. sl st in ch 1 space, sl st in be first ch 3 space.
Round 5) Ch 28, sl st in third ch from hook to make a small ring, ch 3 15dc in small ring, sl st in beginning ch.
Bind off, weave in any extra yarn and you're all done!!
***I'm still working on this pattern and I have made a change. I'll probably make a few more changes but I'll just start off with this one update.
If you want to make your bookmark longer you can always add more chains after you finish your fourth round and then continue on with the pattern as written.***
Monday, August 28, 2017
Just Another Natural Hair Update! Braiding Too Tightly Almost Costed Me My Hair!
Good morning again! I seriously feel like I'm on a role today because I haven't written this much in one day in a really long time and I have to admit that it feels pretty darn good. Anyways I wanted to share one more update and two collages with you because I feel that this topic that I want to write about is very important when it comes to natural hair care.
 Now I love to do protective styles because they're so easy o keep up with and once I have a protective style set and ready for the week, I for the most part won't have to mess around with my hair for a whole week until it's time to take everything down and go on from there. With that said I accidently reminded myself the importance of not putting too much strain on my roots by pulling too tightly when doing a protective style and I want to share that reminder with you.
Now what exactly happened? Well two weeks ago I discovered that my hair was having a hard time drying with the protective style that I had had in previously so I came up with the solution to take everything down, wash and condition my hair, then part my hair into slightly smaller sections so that my roots could breath a little easier, and braid my hair versus the twisting because I wanted to see how my hair would do with the braids vs. the twists.
Now I wish that would had taken pictures when I took my braids down the first week because my ends were beautifully preserved and the moisture retention was awesome! And to top it all off my hair did a much better job drying that week. So with the success that I had that first week I decided that I was going to do the same exact thing all over again, so I changed a few parts but I took my grease mixture and proceeded to grease my hair and scalp and then started to braid my hair all over again. My braids lasted me one day and then I ended up taking them down because I accidentally braided my hair too tightly towards my roots which was causing me some discomfort. Whenever I set a protective style for myself I make sure that My scalp feels good and I make sure that there isn't a section of hair that's pulling too tightly, because I'm not stranger to traction alopecia.
What is traction alopecia? It's a type of hair loss that happens over time due to to much pulling or tension on the hair and it's not something that I want to have to deal with again. If you want to do more reading on traction alopecia I will have a link to a website that helped me learn about it so be sure to check that out if you are interested.
So what did I do to fix my protective style that was causing me discomfort? I took the braids down but replaced the braids with loose twists. I tried over and over to braid as loosely as I possibly could but I just couldn't do it, so I'll be practicing that until I can get the braiding down with hurting myself because I actually like how the braids protect my ends more.
 Not to say that I don't like how my hair came out with the large twist because I was really feeling my hair on this day and the day after! Well I just wanted to share my experience with almost causing more damage to my hair so that I could use my story as an example to be careful! No hair style is worth the risk of loosing your own God given hair.
Be blessed and I'll be talking to you on the next one!!
Learn more about traction alopecia - http://www.hairsentinel.com/traction-alopecia.html

Now what exactly happened? Well two weeks ago I discovered that my hair was having a hard time drying with the protective style that I had had in previously so I came up with the solution to take everything down, wash and condition my hair, then part my hair into slightly smaller sections so that my roots could breath a little easier, and braid my hair versus the twisting because I wanted to see how my hair would do with the braids vs. the twists.
Now I wish that would had taken pictures when I took my braids down the first week because my ends were beautifully preserved and the moisture retention was awesome! And to top it all off my hair did a much better job drying that week. So with the success that I had that first week I decided that I was going to do the same exact thing all over again, so I changed a few parts but I took my grease mixture and proceeded to grease my hair and scalp and then started to braid my hair all over again. My braids lasted me one day and then I ended up taking them down because I accidentally braided my hair too tightly towards my roots which was causing me some discomfort. Whenever I set a protective style for myself I make sure that My scalp feels good and I make sure that there isn't a section of hair that's pulling too tightly, because I'm not stranger to traction alopecia.
What is traction alopecia? It's a type of hair loss that happens over time due to to much pulling or tension on the hair and it's not something that I want to have to deal with again. If you want to do more reading on traction alopecia I will have a link to a website that helped me learn about it so be sure to check that out if you are interested.
So what did I do to fix my protective style that was causing me discomfort? I took the braids down but replaced the braids with loose twists. I tried over and over to braid as loosely as I possibly could but I just couldn't do it, so I'll be practicing that until I can get the braiding down with hurting myself because I actually like how the braids protect my ends more.

Be blessed and I'll be talking to you on the next one!!
Learn more about traction alopecia - http://www.hairsentinel.com/traction-alopecia.html
Postpartum Shedding Is No Joke! Mint And Hair Grease For Hair Repair??!!
Well good morning! It's been such a good little while since I've taken the time to sit down to write about my hair and what all I have been doing to it to get to stay healthy, so I really don't know where I should begin but I'm going to try. I gave birth to my little miracle late last month and not long after that wonderful event I started to notice that my temples were starting to thin. Now I wasn't too concerned about this then and I'm still not today because this is something that I've experienced before.

Now there different ways that people out there have combated postpartum and I have tried several different methods and products in the past to fight this annoying stage of my life after giving birth, but my favorite tools that I love to use when it comes to repairing my hair loss is castor oil and peppermint essential oil.
 I actually looked into peppermint essential oil last summer when I was trying to grow my edges and crown section thicker while growing locs, and when I saw the improvement of my hair I decided to continue using peppermint essential oil along with castor oil and lavender essential oil. The only reason why I did not add lavender essential oil back into my regiment as well is because I still can't stand the smell of it right now but I'm hoping that I will be able to do so soon because I really miss using that oil.
I'm going to leave a link in this post of a website that I found to be very helpful when I decided to learn more about peppermint and how it can help my hair so be sure to check the link out at the end of this blog if you want to learn more!
So what do I do with the castor oil, peppermint essential oil and blue magic? All I do is add the amount of castor oil that I want into my blue magic and I add a decent amount of drops into my grease. I then mix the grease and oils together very well and then apply the grease mixture all over my hair and scalp as usual. I haven't figured out how much of castor oil and essential oil I add in because I'm still experimenting with different amounts of each oil, but once I have that all figured out I will be back to share that with you.
Have I seen any kind of improvement at all?? Well it's been two weeks since I started adding my little mixture to my hair and scalp and I have seen improvement in my balding areas. Now I haven't seen a drastic change and I don't plan on seeing a drastic change for some time but I do know that the grease mixture that I made is helping move forward in the right direction.
If you have suffered through postpartum shedding before what did you use to repair your hair and scalp?
Be Blessed and I'll be talking to you on the next one!
Learn more about peppermint essential oil - https://draxe.com/peppermint-oil-uses-benefits/

Now there different ways that people out there have combated postpartum and I have tried several different methods and products in the past to fight this annoying stage of my life after giving birth, but my favorite tools that I love to use when it comes to repairing my hair loss is castor oil and peppermint essential oil.

I'm going to leave a link in this post of a website that I found to be very helpful when I decided to learn more about peppermint and how it can help my hair so be sure to check the link out at the end of this blog if you want to learn more!
So what do I do with the castor oil, peppermint essential oil and blue magic? All I do is add the amount of castor oil that I want into my blue magic and I add a decent amount of drops into my grease. I then mix the grease and oils together very well and then apply the grease mixture all over my hair and scalp as usual. I haven't figured out how much of castor oil and essential oil I add in because I'm still experimenting with different amounts of each oil, but once I have that all figured out I will be back to share that with you.
Have I seen any kind of improvement at all?? Well it's been two weeks since I started adding my little mixture to my hair and scalp and I have seen improvement in my balding areas. Now I haven't seen a drastic change and I don't plan on seeing a drastic change for some time but I do know that the grease mixture that I made is helping move forward in the right direction.
If you have suffered through postpartum shedding before what did you use to repair your hair and scalp?
Be Blessed and I'll be talking to you on the next one!
Learn more about peppermint essential oil - https://draxe.com/peppermint-oil-uses-benefits/
Saturday, August 19, 2017
Friday, August 18, 2017
Another Knitted Sampler Is In The Making!
Hello there! Since my one of my daughters asked me to knit a knitted sampler of her very own, I picked up my knitting needles and got to work. I actually started this project earlier this year but had to step away from this project for a while, but I'm back it to to finish this up so that it's ready by Christmas. The afghan that I'm working on now will have 16 squares and will be somewhere near 12 inches in length. I recently completed my forth square and I'm now working on my fifth.
The patterns that I'm working with will be found in two different leisure arts books, and the yarn that I'm using is the Red Heart Super Saver. This yarn isn't my first choice but it is the easiest and the cheapest yarn that I can get my hands on at the moment.


My little love picked the colors and most of the squares that I will be working on herself so I know that she will LOVE this gift once it's all done and ready for her to receive.
The patterns that I'm working with will be found in two different leisure arts books, and the yarn that I'm using is the Red Heart Super Saver. This yarn isn't my first choice but it is the easiest and the cheapest yarn that I can get my hands on at the moment.
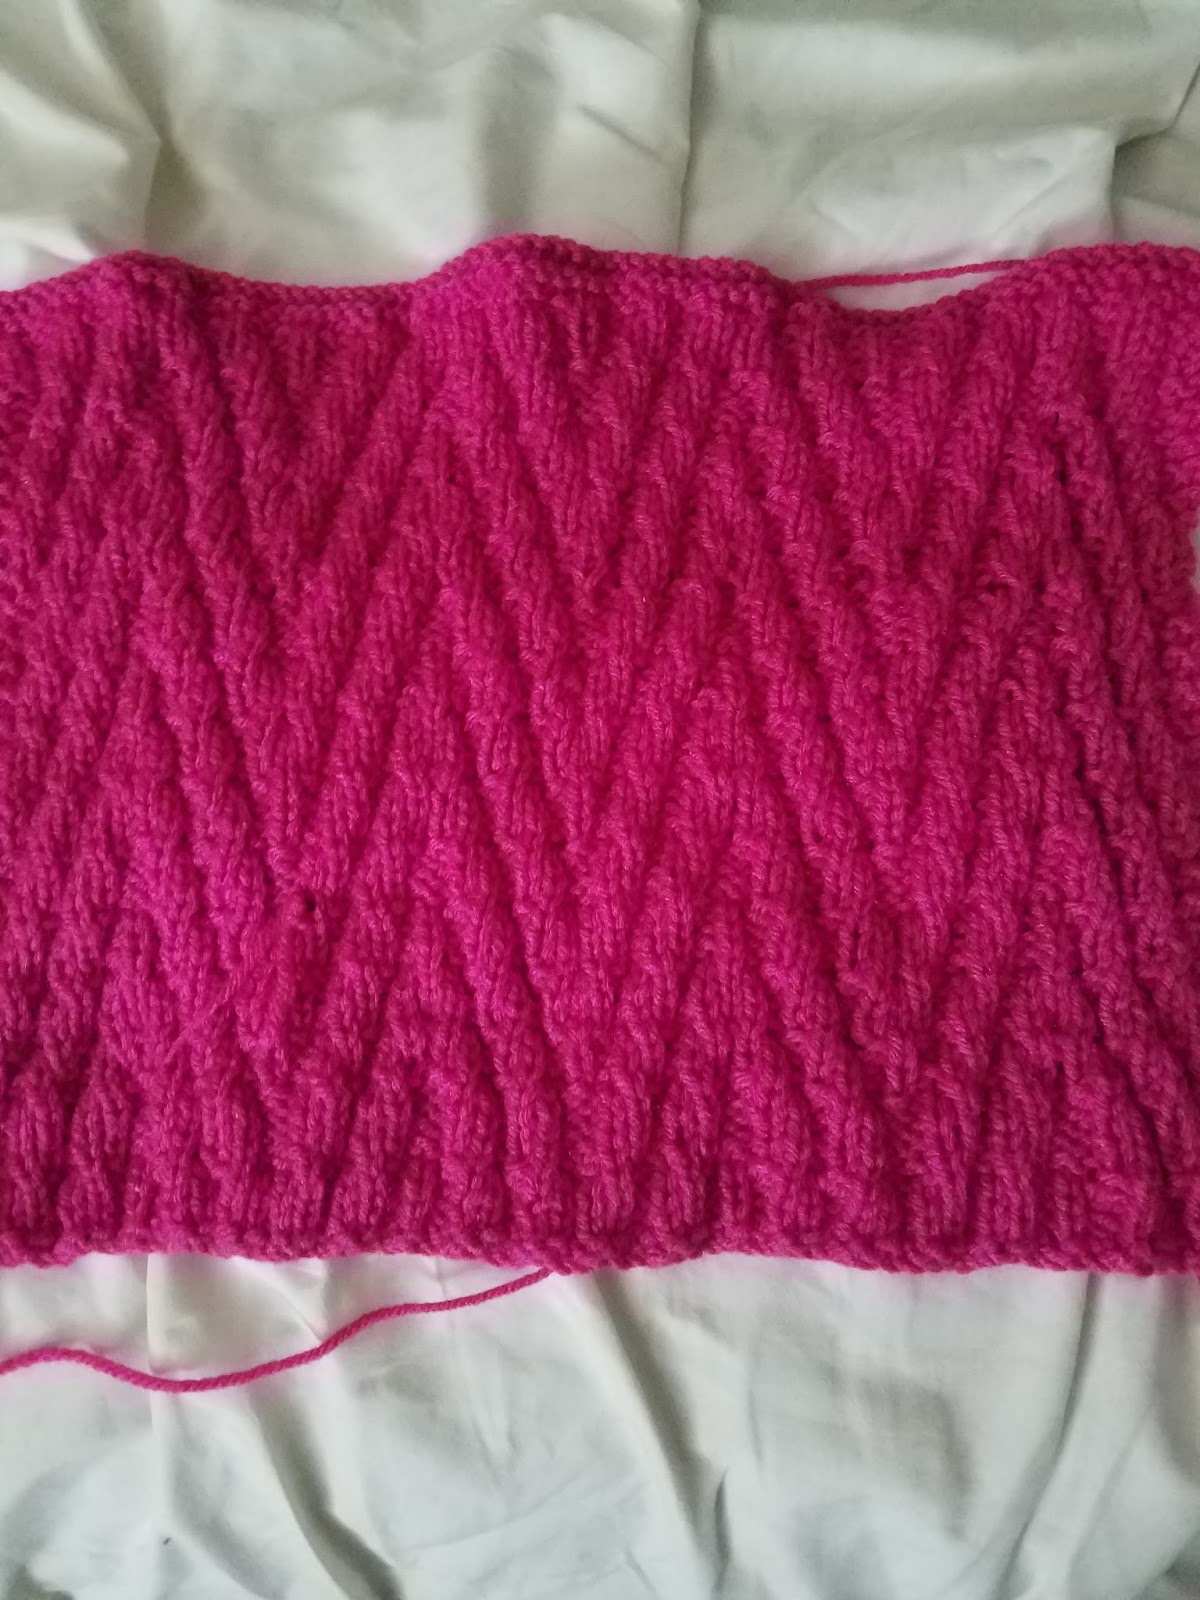


My little love picked the colors and most of the squares that I will be working on herself so I know that she will LOVE this gift once it's all done and ready for her to receive.
A Muddy Worm Cake For My Kiddos!!!
Well hello there! I hope that you are having a great day or evening because I certainly know that I am. I wanted to quickly share a cake that I put together last Friday afternoon for my kids before they got home, because of the simple fact that they've worked so hard in school and deserved an extra special treat.
What all inspired me to try this treat out? Well besides them doing great in school, we had experienced some rain and due to that rain we accumulated a lot of mud in the backyard. And when you have three lovely children who love to play in a backyard full of mud, they're most likely going to bring that mud in the house with them. Now of course I was a little annoyed with the mess that they had brought in, but after cleaning up and going on with my day I quickly got over that little annoyance. Not long after that I came across a video on Facebook that showed me how to make a muddy worm cake and I KNEW that I had to try this out for myself.
I'm not going to write down the directions but I will put a link in this post so that you can see the video for yourself if you choose to do so.
 I can't remember what size pan I used for this cake so I apologize for that. What I can say is that I was going to bake a home made chocolate cake but ran out of time so I went to the store and picked up a boxed chocolate cake instead. After I followed the preparation instructions and finished baking the cake I put it in my freezer so that it could chill more quickly. Once I felt that my cake had cooled down to the point to where it was no longer hot, I poked holes throughout my cake and placed some gummy worms in most of the holes.
 This is where I made the icing with whipped cream and chocolate pudding, and let me just tell you that if you haven't tried this type of icing then you don't know what you're missing!! Everyone loved how light and fluffy this icing was and it just complimented the cake perfectly.
After I smoothed the icing on the cake and worms I took a few extra worms and placed them randomly on top of the icing.
 The last thing that I did was I crushed some oreo cookies then scattered the crumbs all over the cake and this is what I got! I love this cake because the crazier it looks the better it'll be and the kids go crazy for it!
If you want to know more about how to make this fun cake check out the link to the video that helped me out with this fun project. https://youtu.be/9UnueuOe9Cg
Be blessed!!
What all inspired me to try this treat out? Well besides them doing great in school, we had experienced some rain and due to that rain we accumulated a lot of mud in the backyard. And when you have three lovely children who love to play in a backyard full of mud, they're most likely going to bring that mud in the house with them. Now of course I was a little annoyed with the mess that they had brought in, but after cleaning up and going on with my day I quickly got over that little annoyance. Not long after that I came across a video on Facebook that showed me how to make a muddy worm cake and I KNEW that I had to try this out for myself.
I'm not going to write down the directions but I will put a link in this post so that you can see the video for yourself if you choose to do so.


After I smoothed the icing on the cake and worms I took a few extra worms and placed them randomly on top of the icing.

If you want to know more about how to make this fun cake check out the link to the video that helped me out with this fun project. https://youtu.be/9UnueuOe9Cg
Be blessed!!
Wednesday, May 24, 2017
Lacy Ripple By Melissa Leapman Is Complete!!!
Well hello there!! I am so excited to be writing this blog post because I'm going to be sharing with you my latest baby project that I've completed as of yesterday evening!


My husband and I found out late last year that we would be expecting another beautiful blessing into our lives, so I decided that it would be pretty awesome to put together a blanket or two for her as my own personal labor of love for her. I didn't feel like crocheting so I already knew that knitting up her baby blanket would be my best bet.

Well for starters the name of this pattern is called Lacy Ripple, the designer of this pattern is Melissa Leapman, and the book where I discovered this pattern is called Our Best Knit Baby Afghans Book Two by Leisure Arts. I recycled a previous baby blanket that I had crocheted some years ago to put this pattern together and I'm glad that I did because this blanket really did come out lovely. The yarn that was used for this is Lion Brand Pound Of Love and the color of the yarn is called Honey Bee. This pattern calls for me to use two different sizes of knitting needles but I did not feel like having to go back and forth between the two, so I opted to use a size US 10 - 6.0 mm circular knitting needle.


Link to Pattern review! - https://youtu.be/A56DmYOJoME

The having to knit three together was the only thing about this pattern that I just did NOT like at all and that's probably the main reason why I opted to end this project when I did. The pattern calls for me to knit this up to I get to almost 48 inches but I chose to knit this until I got to 40 inches, and then I begin that process of ending this blanket.

Even though I became bored towards the end of this knitting adventure, I'm really happy that this came out the way that it did and I so much look forward to the day when my little sweet girl can use this for the very first time. I go into more detail about my experience with this pattern on Youtube so if you want to see that video I'll leave a link below so you can go check that video out for yourself.
Be Blessed!!
Link to Pattern review! - https://youtu.be/A56DmYOJoME
Monday, May 15, 2017
What My 4C Natural Hair Looks Like TWO YEARS After Transitioning From My Color Damage!!!!
Well hello!! I cannot believe that it's been two years already since I decided to do something about my color damage hair. It hasn't been an easy two years to get my hair back to a healthy place, but the journey was well worth it because I was able to learn so much about myself and my hair.
The main things that I did that helped me hair heal and grow was that I stopped coloring my hair, I became committed to keeping a healthy and consistent hair regimen that worked for me, and protective styling became my very best friend!!
I don't want to make this post too long but I do want to share a few photos that I took over the past two years just to help myself keep track of my progress.


These two pictures were taken about a month or two after I colored my hair for the second time which was August of 2015. I loved the volume of hair that I had but I noticed that my hair was extremely dry and brittle. :-(


The next two pictures were taken sometime in October of 2015 I believe. This was about a month after I discovered that I had color damage and I then decided that I was going to start transitioning from my color damage, versus choosing to cut everything off to start from scratch.


The next two pictures were taken on July 15, 2016. By now the majority of my color ends had been cut off which made both me and my hair feel fabulous!


And these last two pictures were taken yesterday May 14, 2017! I still have less than an inch of color towards the front section of my hair, but other than that the rest of my hair is color free!! This year is going to be a year of rest and restoration for my hair and for that I'm excited to see what more my hair journey holds for me!!
Cheers to healthy hair!!!!
Tuesday, May 9, 2017
Yay For Low Manipulative Protective Hair Styles!!!

Well hello there! I don't want to stay here and write too much but I do want to take some time to share a protective style that I rocked last week that I absolutely adored. Ever since I caused color damage to my hair I decided that I was going to do everything that I could to help my hair bounce back to being healthy again, and my number one way of doing so was to do low manipulative protective hair styles.
When it comes to what all I used to make this easy hair style happen, I used a wide tooth comb, a few bobby pins, Taliah Waajid Curly Curl Cream, Blue Magic, water and my satin hair scarf.
I wanted to share this quick blog just to show that taking care of natural hair doesn't have to be difficult or too time consuming. Well I gotta get back to knitting so I'll be back later to share some projects and to share my progress on how my hair has changed from the previous year. Be blessed!!
Tuesday, April 18, 2017
Beachcoco Women's Maternity Sweetheart Party Maxi Dress Product Review!!
Well hello! I don't want to make this post too long but I wanted to come here quickly to rave about a dress that I recently treated myself to for myself. To make a long story short this dress is amazing and I can't wait to purchase another one for myself!

 The dress itself fits beautifully and despite me originally thinking that this dress would be a bit shorter, the length is actually perfect. I decided to put a bandeau underneath my dress because the cut of the dress up top was a little too low for my liking since I planned on wearing it to church.

The cardigan was also purchased by me on Amazon and I LOVE this as well AND it was a little under 10 bucks!
My husband is distracting me with his cute self so I'm going to go ahead and sign off here!


The cardigan was also purchased by me on Amazon and I LOVE this as well AND it was a little under 10 bucks!
My husband is distracting me with his cute self so I'm going to go ahead and sign off here!
Friday, April 14, 2017
Well That Was Short Llived!! From Locs to Loose Natural Hair!!

As far as my regiment is concerned I'm still keeping my routine as simple as possible with washing my hair every other week and I thoroughly moisturize and seal my hair with a moisturizer of my choice and some kind of grease. Length used to be my number one goal but I've slowly evolved to yearn for healthier hair instead because I know that as long as my hair is healthy, the length of my hair will continue to thrive.

Thursday, March 23, 2017
New Knitting Project For Our New Baby!!! It's Been Too Long!!!
Well let me just start off by saying that it's been far too long since I've been here to write to you. Between starting and stopping my Loc Journey that I took time to document on another brief blog, to keeping up with my kids and to growing a brand new human being, it's been a crazy 11 months!
When I think of where I was with this blog almost a year ago I guess I can admit that I kind of fell out of love with writing as much as I once used to because I really didn't know where I wanted to continue on with this blog. I was lost and confused as to what exactly I wanted to continue to write about here. Then it happened! Right before I was about to go pick up my kids from school, I accidentally stumbled upon a message on Facebook that I had received almost FOUR YEARS AGO!! Apparently I have some kind of filter on my messages that I didn't know about which was the cause of me not seeing the plethora of messages that I had waiting for me. Anyways I opened up a letter from a kind woman who had come across one of my many projects on pinterest and wanted to know where I had found the pattern that I had used.
This short sweet note sparked something in me that had been dead for almost a year now and that something that was sparked was the passion to get on here to share my crochet and knitting adventures like I had done so before in the past. So here I am! I can't promise to write here very often because life is pretty busy with my four 1/2 kiddos but I do promise to come here as often as I can to sharer a little bit of myself and a little bit of my projects with you once again!!
So with all of that said here's the latest project that I'm working on now!
 The name of the pattern that I'm using for this baby blanket is called Lacy Ripple and the designer of this blanket is Melissa Leapman. I found this pattern in the Leisure Arts Book called Our Best Knit Baby Afghans Book 2 and I really love how my project is coming out. This picture is a few days old so I'm a bit further along with this blanket now.
Well I would love to write more but momma duty calls so be blessed and I will be back to write back soon enough!!!
When I think of where I was with this blog almost a year ago I guess I can admit that I kind of fell out of love with writing as much as I once used to because I really didn't know where I wanted to continue on with this blog. I was lost and confused as to what exactly I wanted to continue to write about here. Then it happened! Right before I was about to go pick up my kids from school, I accidentally stumbled upon a message on Facebook that I had received almost FOUR YEARS AGO!! Apparently I have some kind of filter on my messages that I didn't know about which was the cause of me not seeing the plethora of messages that I had waiting for me. Anyways I opened up a letter from a kind woman who had come across one of my many projects on pinterest and wanted to know where I had found the pattern that I had used.
This short sweet note sparked something in me that had been dead for almost a year now and that something that was sparked was the passion to get on here to share my crochet and knitting adventures like I had done so before in the past. So here I am! I can't promise to write here very often because life is pretty busy with my four 1/2 kiddos but I do promise to come here as often as I can to sharer a little bit of myself and a little bit of my projects with you once again!!
So with all of that said here's the latest project that I'm working on now!

Well I would love to write more but momma duty calls so be blessed and I will be back to write back soon enough!!!
Tuesday, May 31, 2016
ALL THE CRAZY AND RIDICULOUS JUDGEMENTS NEED TO STOP.
Hey readers. I was really hoping to come back here with some fun and possitive to share with you but I just can't do that at this time because I have a very important topic to share with you and it just cannot wait any longer. I tried uploading a video on two different devices and both of those are either low on battery or is low on battery and isn't charging the way it should so I have resorted to coming here instead.
It's not that I don't like blogging anymore, but it's just that it's been pretty tricky finding the time to write a decent post while trying to watch my pups and kiddos but I will do my best to come back to this blog a little more often.
Anyways, the reason why I want to come here to rant a little bit is because I have been reading and hearing A LOT of backlash over an incident that happened this past weekend. And even though I do find a lot of the judgments to be on point there are just some things that are being said that should never leave a person's mouth. Especially when it comes to someone else child, parent, or friend. Point blank period.
Sometime over the weekend a small child was with their family on a family visit to the zoo in Cincinnati Ohio. At some point and time the boy somehow wondered off and found their way in a gorilla exhibit. It's unclear as to how long the boy had been missing and it's also unclear as to how long the boy had been in there, and sadly the gorilla who was in the exhibit was forced to be put down so that the child could be retrieved from the exhibit safely.
There are just so many different thoughts that continue to run through my mind when I think about this incident that occurred. An incident that should have NEVER transpired but at the end of the day, it did. Now there is no doubt in my mind that the mother was negligent in all of this and should somehow be held responsible for the death of the gorilla, BUT it was an ACCIDENT PEOPLE!!!
Seriously as I typed the scenario out on this blog all I wanted to do for a hot second is call this mother all kinds of stupid but what would that prove?? What would that change?? She isn't the world's most perfect mother but what mother is??? And please don't sit up here and say 'Oh I would NEVER let my child do anything like that', because God has a funny way of humbling the folks that just love to say the 'Oh I would NEVER..' quote. Trust me on that one.
My heart goes out to the little boy that had to survive through that whole ordeal and my heart goes out to the gorilla that was put down. My heart also goes out to the mother because I KNOW that the last thing that she would have ever wanted for her son would have to end up in ANY animal exhibit of ANY kind!
NONE of us, whether you're a parent or not, are perfect so stop socially crucifying this woman as if our crap don't stink because it does! And for all that is good and kind in this world, stop wish death and ill will toward this woman because at the end of the day,she's still someone's mother, daughter, wife/partner and friend.
She's imperfect just like the rest of us.
It's not that I don't like blogging anymore, but it's just that it's been pretty tricky finding the time to write a decent post while trying to watch my pups and kiddos but I will do my best to come back to this blog a little more often.
Anyways, the reason why I want to come here to rant a little bit is because I have been reading and hearing A LOT of backlash over an incident that happened this past weekend. And even though I do find a lot of the judgments to be on point there are just some things that are being said that should never leave a person's mouth. Especially when it comes to someone else child, parent, or friend. Point blank period.
Sometime over the weekend a small child was with their family on a family visit to the zoo in Cincinnati Ohio. At some point and time the boy somehow wondered off and found their way in a gorilla exhibit. It's unclear as to how long the boy had been missing and it's also unclear as to how long the boy had been in there, and sadly the gorilla who was in the exhibit was forced to be put down so that the child could be retrieved from the exhibit safely.
There are just so many different thoughts that continue to run through my mind when I think about this incident that occurred. An incident that should have NEVER transpired but at the end of the day, it did. Now there is no doubt in my mind that the mother was negligent in all of this and should somehow be held responsible for the death of the gorilla, BUT it was an ACCIDENT PEOPLE!!!
Seriously as I typed the scenario out on this blog all I wanted to do for a hot second is call this mother all kinds of stupid but what would that prove?? What would that change?? She isn't the world's most perfect mother but what mother is??? And please don't sit up here and say 'Oh I would NEVER let my child do anything like that', because God has a funny way of humbling the folks that just love to say the 'Oh I would NEVER..' quote. Trust me on that one.
My heart goes out to the little boy that had to survive through that whole ordeal and my heart goes out to the gorilla that was put down. My heart also goes out to the mother because I KNOW that the last thing that she would have ever wanted for her son would have to end up in ANY animal exhibit of ANY kind!
NONE of us, whether you're a parent or not, are perfect so stop socially crucifying this woman as if our crap don't stink because it does! And for all that is good and kind in this world, stop wish death and ill will toward this woman because at the end of the day,she's still someone's mother, daughter, wife/partner and friend.
She's imperfect just like the rest of us.
Thursday, April 28, 2016
Introducing our Robin Sparkles!!!


Well that's the few pictures that I have ready to share with y'all right now but I will be back later to share more. I'm so happy that Robin is doing better and we all look forward to growing with her and Lily together.
Be blessed and have a wonderful day!!!
Saturday, April 23, 2016
Our Robin Sparkles Is Home!
Not once in my wildest dreams did I ever think that we would ever bring another pup into our lives this soon! I mean, we just got Lily Sue last year and had to adapt to her, and then we moved and now we're all adapting to that, and after all that we added yet another little pup into our little family.
Please let me continue to entry by saying good evening and welcome to my blog! Due to life being what it is, I'm not able to get here nearly as often as I used to, or would like, so to be able to sit at my computer desk with Robin is quite a delight to say the least. But let me go ahead and get to the point of this entry who just so happens to be little Miss Robin.
As a family we already knew that we wanted to add another dog into the mix that way Lily Sue could have someone to play with, but we wanted to wait a while until my youngest was a little bit older and also wanted to wait until we were a little more settled into our home.
So with all that in mind we were pretty content with our family just as it was. Now I'm not going to lie. Every now and then I would check our local shelters and would scan craigslist just to see what dogs were out there, but I never looked with the sole intent on finding a dog just as I did with Lil.
With all that in mind I'm going to briefly about the events that happened a few days ago on how we came to know Robin. It was a regular non eventful Thursday morning I got a message from a friend that there was a pocket pit that needed out of a shelter ASAP, and since she knew how we loved this breed she wanted to share this info with us. She also knew that we were, one day in the far off future, looking for a dog to add to our family so she thought that it would be a perfect fit. Despite our plans on waiting to add another dog into our life, after looking the beautiful girl's picture and video we fell in love with her and planned on taking her home.
So after speaking with a volunteer I was able to put a tag on the dog next day, which was Friday, and wasted no time getting there since she was running out of time. Before we left for the shelter the volunteer had let me know that the dog was aggressive towards most females but was pretty much okay with males. Learning this made me have my heart on guard so I didn't want to completely get my hopes up but I still in fact wanted to have hope for the best, so we loaded our kids and Lily Sue up in the car so we could go meet this potential new family member of ours.
Well the meet and greet with Lil and Carly did not go well at all and we sadly had to say no to taking her home but with the help of another person that works at the shelter we found and adopted Robin!! I can honestly say that she's the first pup that picked us, as compared to us picking her. She's this beautiful little ball of delight and I couldn't be any more happier with her, and I'm also happy to say that Lily Sue has made a sweet life long friend. All she wants to do is play with her!
I can't put pictures of her up now but will do so as soon as I can but yes this is my long entry of how we got our Robin Sparkles!
The name comes from a favorite show of ours by the way. :-D
Please let me continue to entry by saying good evening and welcome to my blog! Due to life being what it is, I'm not able to get here nearly as often as I used to, or would like, so to be able to sit at my computer desk with Robin is quite a delight to say the least. But let me go ahead and get to the point of this entry who just so happens to be little Miss Robin.
As a family we already knew that we wanted to add another dog into the mix that way Lily Sue could have someone to play with, but we wanted to wait a while until my youngest was a little bit older and also wanted to wait until we were a little more settled into our home.
So with all that in mind we were pretty content with our family just as it was. Now I'm not going to lie. Every now and then I would check our local shelters and would scan craigslist just to see what dogs were out there, but I never looked with the sole intent on finding a dog just as I did with Lil.
With all that in mind I'm going to briefly about the events that happened a few days ago on how we came to know Robin. It was a regular non eventful Thursday morning I got a message from a friend that there was a pocket pit that needed out of a shelter ASAP, and since she knew how we loved this breed she wanted to share this info with us. She also knew that we were, one day in the far off future, looking for a dog to add to our family so she thought that it would be a perfect fit. Despite our plans on waiting to add another dog into our life, after looking the beautiful girl's picture and video we fell in love with her and planned on taking her home.
So after speaking with a volunteer I was able to put a tag on the dog next day, which was Friday, and wasted no time getting there since she was running out of time. Before we left for the shelter the volunteer had let me know that the dog was aggressive towards most females but was pretty much okay with males. Learning this made me have my heart on guard so I didn't want to completely get my hopes up but I still in fact wanted to have hope for the best, so we loaded our kids and Lily Sue up in the car so we could go meet this potential new family member of ours.
Well the meet and greet with Lil and Carly did not go well at all and we sadly had to say no to taking her home but with the help of another person that works at the shelter we found and adopted Robin!! I can honestly say that she's the first pup that picked us, as compared to us picking her. She's this beautiful little ball of delight and I couldn't be any more happier with her, and I'm also happy to say that Lily Sue has made a sweet life long friend. All she wants to do is play with her!
I can't put pictures of her up now but will do so as soon as I can but yes this is my long entry of how we got our Robin Sparkles!
The name comes from a favorite show of ours by the way. :-D
Friday, March 25, 2016
Pixel Deadpool Afghan In Progress..Still!!

My project a little over half way done!
Well hello there! I was really hoping that I would have been done with this monstrosity by now but, as you can obviously see I've yet to see the finish line for this one. I ran out of black yarn AGAIN so I have to take myself to Walmart so I can pick up a few large skeins and I'm about to rum=n out of the yarn for the background so I'm going to have to pick up a few more skeins for that as well.
On a positive note, I finally reached the eyes so that's cool! Once I can I'll get a more updated picture of my progress.
Never underestimate the power of a granny square!
Thursday, March 24, 2016
This Granny Square Is Done!

I honestly cannot tell you how excited I actually am to have finished this in only three days! Connecting my granny squares together with double crochets was one of the most fun techniques that I've tried with any of my crocheting projects and I look forward to doing a project similar to this again soon.
Now I just need to get it shipped out before my nephew grows out of this blankie!
What are you crocheting today??
My Second Mini Chop After Color Damage!!!

Here's a before picture of my hair a few weeks before my mini chop.

The top left is a final before picture and the last three pictures are the results of my mini chop!
I wasn't planning on doing a mini chop this soon but, after looking at photos of my hair from some years back, I decided that I had to take some kind of action to get rid of the damaged hair that I was still holding onto.
At the end of it all I'm glad that I went with a mini chop versus a big chop and I look forward to doing another mini chop within the next 3 to four months!
Cheers to healthier hair!
Subscribe to:
Posts (Atom)